Quick Answer: Effective footwear adjustments for ankle stability and arch support focus on three interventions: using runner's loop (heel-lock) lacing to prevent heel slippage, swapping factory sock liners for structured semi-rigid insoles (such as Superfeet Green or Powerstep Pinnacle, costing $45 to $60), and adding 2 to 4mm medial heel wedges to control excessive inward rolling. Most minor mechanical instabilities resolve within 7 to 14 days of consistent wear.
Navigating daily terrain requires a stable foundation, yet many standard athletic shoes and work boots fail to provide adequate mechanical bracing straight out of the box. Mastering footwear adjustments for ankle stability and arch support is an essential skill for runners, industrial workers, hikers, and individuals managing conditions like posterior tibial tendon dysfunction or chronic ankle instability. The human foot contains 26 bones, 33 joints, and over 100 muscles, tendons, and ligaments designed to absorb shock and distribute load; when footwear fails to seat these structures correctly, the entire kinetic chain suffers.
Biomechanical stability is fundamentally about kinetic efficiency and structural integrity. Just as properly engineered residential foundations and bathroom drainage systems rely on precise grading to prevent water from accumulating and compromising structural subfloors, your lower limbs require balanced load distribution to prevent shear stress from wearing down delicate ligaments. When the subtalar joint overpronates or rolls laterally without restriction, the talocrural joint undergoes uneven angular forces, drastically elevating your risk of ligamentous sprains, plantar fasciitis, and patellofemoral pain syndrome.
Fortunately, achieving medical-grade stabilization does not always mandate expensive custom prescription orthotics. By understanding how to manipulate lacing geometry, customize internal volume, add targeted wedge posting, and optimize heel cup friction, you can transform an ordinary pair of shoes into a high-performance orthopedic tool tailored to your unique anatomical profile.
Targeted Lacing Configurations for Heel Lock and Midfoot Security
Lacing is the most cost-effective yet widely underutilized footwear adjustment. The way you route and tension your shoelaces fundamentally alters the shoe's upper tension, dictating how securely the calcaneus (heel bone) is held against the internal heel counter and how evenly pressure is distributed across the dorsal navicular bone.
The Runner's Loop (Heel Lock) for Ankle Lockdown
The runner's loop, frequently referred to as the "heel lock" or "lace lock", is the premier adjustment for anyone suffering from calcaneal slippage or chronic lateral ankle instability. Most athletic shoes from brands like Brooks, Asics, and Saucony feature an extra eyelet placed slightly higher and further back along the collar. Rather than crossing your laces over at this final junction, feed each lace end directly back through this upper eyelet on the same side, creating a small loop on both flanks of the collar. Next, take each lace end, cross it over the tongue, thread it through the opposing loop, and pull forward and down before tying a standard knot.
This arrangement functions like a cinching pulley. By pulling the lace ends through the loops, the collar pulls forward and downward simultaneously, locking the heel into the rear pocket of the shoe. In clinical biomechanical trials, heel-lock lacing reduces rearfoot motion and plantar contact velocities by up to 18%, significantly mitigating the micro-shifts that lead to ankle rollover on uneven surfaces.
Window Lacing and Diagonal Lacing for Arch Pressure Relief
While rearfoot lockdown is vital, overtightening laces across the midfoot can compress the dorsal nerves and compromise circulation, exacerbating foot fatigue. Window lacing (or parallel lacing) eliminates crossing laces directly over high-pressure zones, such as a prominent navicular bone or an elevated bone spur. To execute this, unlace your shoe to the point immediately below the sensitive zone, run the laces vertically up the side eyelets without crossing them, and then resume normal criss-cross lacing once you pass the tender area. This creates an open "window" that allows the dorsal aspect of the foot to expand naturally during the push-off phase without sacrificing structural containment.
Optimizing Lace Materials and Tension Ratios
The material composition of your laces directly influences how well your tension adjustments hold throughout the day. Standard flat woven cotton laces stretch under tension, often loosening after 20 to 30 minutes of rigorous walking. Replacing them with 45- to 54-inch semi-elastic flat polyester or silicone lock-lace systems ensures consistent tension. Segmented lacing, using two shorter laces per shoe instead of one long lace, enables you to establish a relaxed fit in the forefoot toe box while maintaining rigid, high-tension stabilization across the ankle collar.
Orthotic Insoles, Medial Wedges, and Heel Counter Enhancements
While lacing controls the upper wrap, internal additions manage the foundational interface between the plantar surface of your foot and the midsole of the shoe. Standard factory sock liners provide virtually zero structural integrity; they consist primarily of 3mm to 5mm open-cell EVA foam designed to feel plush in the retail store rather than stabilize skeletal structures during gait.
Over-the-Counter vs. Custom Orthotic Insoles
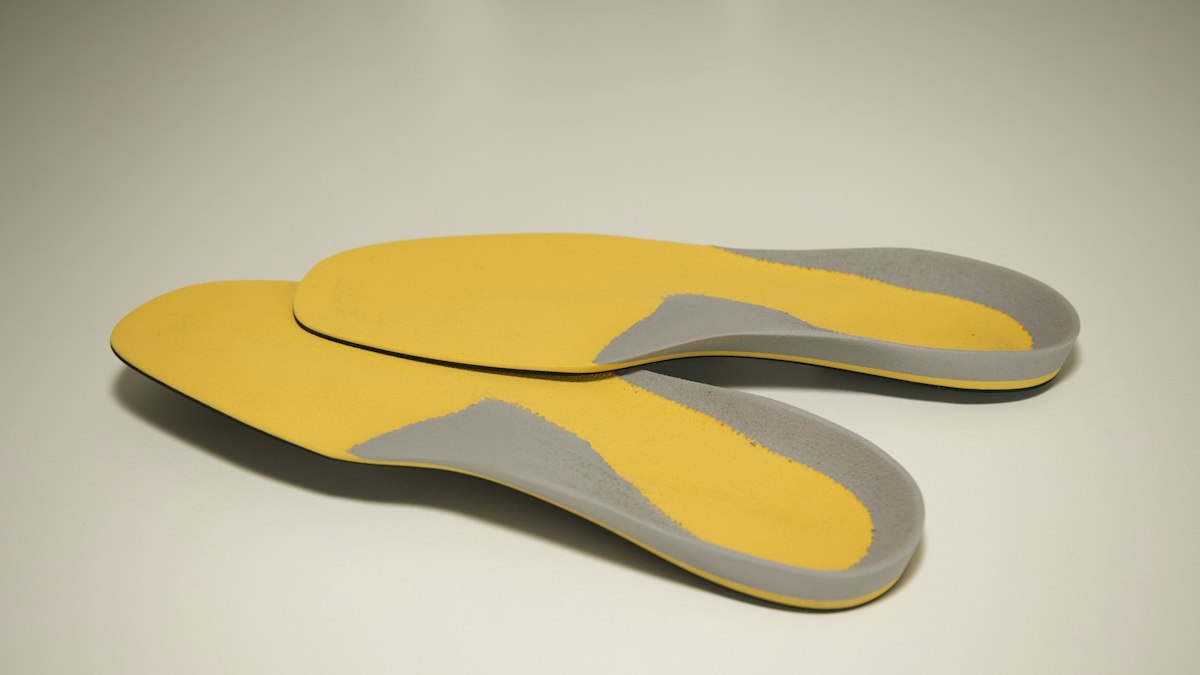
Upgrading your factory footbeds to high-grade over-the-counter (OTC) orthotics is the fastest way to upgrade both rearfoot hold and longitudinal midfoot support. Trusted market options like Superfeet Green ($55), Powerstep Pinnacle ($45), and SOLE Performance Footbeds ($60) incorporate high-density polyurethane bases paired with rigid nylon or polypropylene stabilizer caps. When selecting an insole, look for a deep, contoured heel cup (at least 15mm to 20mm in depth) that physically cradles the calcaneal fat pad. This natural tissue acts as your body’s shock absorber; keeping it contained under the heel bone enhances inherent skeletal stability. Integrating structured arch support prevents the medial longitudinal arch from collapsing inward during mid-stance, which directly relieves the posterior tibial tendon and reduces rotational torque on the ankle.
Medial Heel Wedges and Posting for Pronation Control
For individuals who suffer from severe overpronation, where the ankle rolls excessively inward upon weight-bearing, a standard insole may not fully balance the rearfoot. In such cases, micro-adjustments using adhesive medial heel wedges (costing roughly $12 to $20 for a multi-pack) provide game-changing relief. These firm, angled EVA or rubber inserts adhere directly beneath the insole on the inner (medial) half of the heel seat. Adding a 2- to 4-degree wedge alters the calcaneal strike angle at initial ground contact, reducing the maximum velocity of pronation and preventing the internal rotation of the tibia that frequently causes ankle instability and knee strain.
Rearfoot Collar Pads and Heel Grips
Anterior or posterior slippage inside the shoe rapidly destabilizes the ankle joint by increasing shear forces. Self-adhesive silicone or suede heel-lock pads (typically $8 to $15 per set) can be placed along the interior collar lining directly against the Achilles notch. These pads reduce empty volume in the collar, preventing the heel from lifting prematurely during terminal stance and ensuring that the foot engages fully with the footwear’s stability features with every stride.
Structural Shoe Modifications and Selection Frameworks
No footwear adjustment can completely compensate for a shoe that lacks structural integrity. Combining physical modifications with informed footwear selection creates an optimal mechanical system that keeps the ankle aligned over the foot's center of pressure.
Assessing Torsional Rigidity and Heel Counter Stiffness
Before implementing adjustments, evaluate the shoe using two manual diagnostic checks: the torsion test and the heel counter squeeze test. First, hold the shoe at the heel and toe, then attempt to twist it like a wet towel. A stable shoe should resist twisting through the midfoot shank; excessive torsional flexibility indicates a lack of structural support, which forces the stabilizing muscles of your lower leg to work overtime. Second, firmly press your thumb against the exterior rear of the shoe's heel counter. If the counter collapses easily under thumb pressure, it lacks the rigidity needed to anchor your calcaneus during abrupt directional shifts.
Cobbler Modifications: Flaring, Buttressing, and Rocker Soles
When off-the-shelf adjustments fall short, a qualified shoe repair cobbler or certified pedorthist can perform permanent mechanical alterations for between $35 and $85. One highly effective modification for recurrent lateral ankle sprains is an outsole flare (or lateral buttress). The cobbler cements a firm, wedge-shaped high-density EVA extension along the lateral edge of the outsole, widening the ground contact footprint by 5mm to 10mm. This widened perimeter creates a wider lever arm that physically prevents the shoe from tipping over onto its outside edge.
Managing Footwear Demands in Daily Life and Travel
Maintaining stable feet during prolonged walking or urban transit requires a dynamic approach to shoe adjustments. Foot exhaustion and ligament strain remain among the most common travel problems faced by active adults who log tens of thousands of steps on rigid concrete sidewalks. As your feet swell naturally throughout the day, often expanding by up to half a shoe size by late afternoon, static lacing can restrict circulation, while completely loose shoes induce instability. Utilizing elastic tension laces alongside adjustable volume spacers (1mm to 2mm flat felt under-insole inserts) allows you to micro-tune interior volume as physical fatigue sets in, preserving rock-solid ankle control without inducing midfoot ischemia.
Final Thoughts
Key Takeaway: Optimizing your footwear for ankle stability and arch support does not require purchasing bespoke, highly specialized footwear. By implementing the runner's loop lacing technique, swapping factory liners for rigid-cup insoles, and utilizing targeted medial wedges, you can systematically correct abnormal rearfoot eversion and protect vulnerable joints.
Give your lower extremity biomechanics 10 to 14 days to adapt to any new structural adjustment. If persistent instability, localized sharp pain, or recurrent rolling continues despite these footwear modifications, consult a podiatrist or physical therapist for a comprehensive gait evaluation and tailored rehabilitative protocol.
Frequently Asked Questions
How tight should heel-lock lacing be for daily wear?
The runner's loop should feel snug against the collar without pinching the Achilles tendon or cutting off blood flow. You should be able to slide one pinky finger between the tongue and your ankle. Overtightening can cause extensor tenosynovitis on the dorsal aspect of the foot within 24 to 48 hours.
Can arch supports weaken ankle muscles over time?
No, clinical studies show that proper arch supports do not atrophy intrinsic foot muscles when used appropriately. Instead, they position the subtalar joint in neutral alignment, allowing stabilizing muscles like the peroneus longus and tibialis posterior to fire efficiently with proper leverage rather than remaining chronically strained.
How often do aftermarket supportive insoles need to be replaced?
Over-the-counter supportive insoles like Superfeet or Powerstep typically maintain their structural integrity for 300 to 500 miles of running or 6 to 12 months of daily walking. Once the heel cup begins to splay outward or the foam flattens irreversibly, their stabilizing capacity declines dramatically.
Are high-top shoes better than low-tops for ankle stability?
Not necessarily. While high-top footwear provides proprioceptive tactile feedback against the lower shin, ankle stability is primarily driven by heel cup rigidity, midsole torsional stiffness, and a wide ground contact platform. A structured low-top shoe with heel-lock lacing provides vastly superior stability compared to a flexible, unsupportive high-top sneaker.
What is the difference between a neutral shoe and a stability shoe?
Neutral shoes feature uniform midsole foam density designed for runners with normal pronation mechanics. Stability shoes integrate firm medial posting, dual-density EVA foam, or guide-rail structures along the inner midsole edge (retailing for $130 to $170) to mechanically resist excessive inward rolling of the calcaneus and midfoot arch.